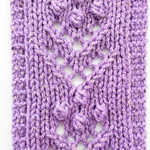
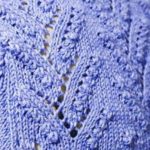
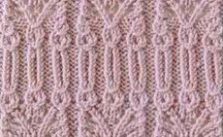
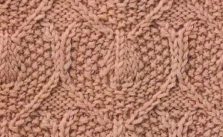
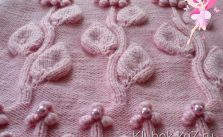
The Bobble and Eyelet Lace Panel combines small raised bobbles with symmetrical lines of eyelets to create a decorative textured knitting motif. The eyelets travel diagonally towards and away from the centre, framing the bobble details and creating a balanced ornamental panel.
Worked over 25 stitches with a 10-row repeat, this textured lace knitting pattern is a beautiful choice for adding a central feature to sweaters, cardigans, scarves, blankets, cushion covers and other knitted projects.

Pattern Details
- Panel Width: 25 stitches
- Row Repeat: 10 rows
- Techniques: Knit, purl, yarn overs, decreases and bobbles
- Worked Flat: Yes
Abbreviations
- k: knit
- p: purl
- st(s): stitch(es)
- k2tog: knit 2 stitches together
- skpo: slip 1 stitch knitwise, knit 1, pass the slipped stitch over
- yfd: yarn forward
- yfrn: yarn forward and round needle
- yon: yarn over needle
- MB-1: make bobble 1
- RS: right side
How to Make Bobble 1 (MB-1)
MB-1: p1, k1, p1, k1, p1 all into the next stitch, turn, k5, turn, p5, then pass the 2nd, 3rd, 4th and 5th stitches over the first stitch and off the needle.
The bobble is worked entirely from one stitch. Five stitches are temporarily created and worked back and forth before four stitches are passed over the remaining stitch to complete the raised bobble.
Bobble and Eyelet Lace Panel Pattern
Cast on 25 stitches for the panel.
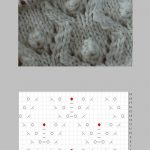
Row 1 (RS): p1, k4, k2tog, k3, yfrn, p5, yon, k3, skpo, k4, p1.
Row 2: k1, p9, k5, p9, k1.
Row 3: p1, k3, k2tog, k3, yfd, k1, p2, MB-1, p2, k1, yfd, k3, skpo, k3, p1.
Row 4: k1, p9, k5, p9, k1.
Row 5: p1, k2, k2tog, k3, yfd, k2, p5, k2, yfd, k3, skpo, k2, p1.
Row 6: k1, p9, k5, p9, k1.
Row 7: p1, k1, k2tog, k3, yfd, k3, p1, (MB-1, p1) twice, k3, yfd, k3, skpo, k1, p1.
Row 8: k1, p9, k5, p9, k1.
Row 9: p1, k2tog, k3, yfd, k4, p5, k4, yfd, k3, skpo, p1.
Row 10: k1, p9, k5, p9, k1.
Repeat Rows 1–10 for the pattern.
Helpful Knitting Notes
This is a 25-stitch decorative panel rather than an all-over stitch repeat. If you are incorporating it into a larger piece, place stitch markers immediately before and after the panel to make the motif easier to follow.
The eyelets gradually move across the panel on the right-side rows. The paired decreases lean towards the lace openings and help create the symmetrical lines framing the centre of the design.
MB-1 is a turned bobble. After making five stitches into one stitch, you turn the work to complete the small bobble section before returning to the main pattern row. Keep the five stitches reasonably loose so they are easy to work and pass over one another.
Rows 3 and 7 contain the raised bobble details. Row 7 has two bobbles close together, so take care to complete each entire MB-1 before continuing with the surrounding purl stitches.
The original pattern distinguishes between yfd, yfrn and yon because the yarn is being moved around the needle from different starting and finishing positions. Follow the yarn movement as written to create the eyelet without accidentally adding an extra wrap.
Finishing Tip
Gentle blocking will help open the eyelets and define the diagonal lines of the lace panel. Avoid pressing the bobbles flat; allowing them to remain raised gives the finished stitch its characteristic combination of lace and three-dimensional texture.