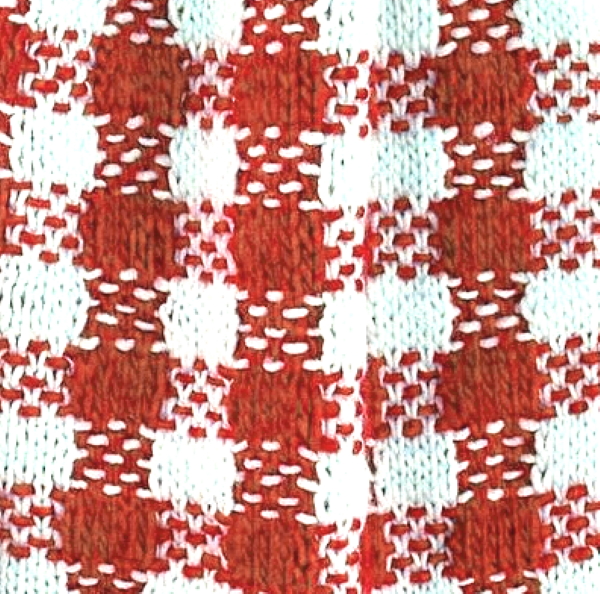
Slip Stitch Checkerboard Tutorial.
1: Every other stitch is slipped with the contrast color at the front of the work.
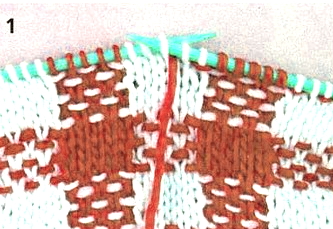
2: After slipping the stitch purlwise, bring the yarn to the back between the needles, this will create a float.

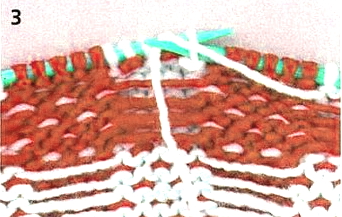
3: On the wrong side, after slipping five stitches of the opposite color, carry the yarn loosely across these stitches to purl the next stitch.
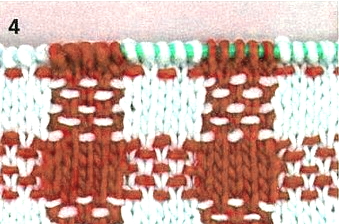
4: The complete stitch will look like this on the needles.
I like this so much! Never seen it anywhere else before. I think I feel a shawl coming on with two muted shades in this plaid pattern…